Thursday 27 September 2012

Licensing and Product Mock-ups

One can dream of having their designs actually printed on products, in shops, for sale and I'm happy to say that I'm lucky enough to have been found by an agency recently, and have begun designing some new collections for them to license.

Very Exciting isn't it?

Until recently, I've but dreamed of having my designs on products to actually sell, and previously I've mocked up some of my patterns on products, to see whether they would fit.

Today I am going to share the mock-ups, and you never know, the right person might be looking.


Stationery

Dream Client: Paperchase/Marks and Spencer


Children/Baby

Ideal Client: Stokke, Mothercare


Partywear


Interior and Homeware

Ideal Client: Next, Marks and Spencer, Debenhams


Fashion

Dream Client: Hunter's, Next


Thanks for Dreaming with me.

Until Next Time. 

Sunday 23 September 2012

Getting that Christmas Feeling

Hello Everyone.

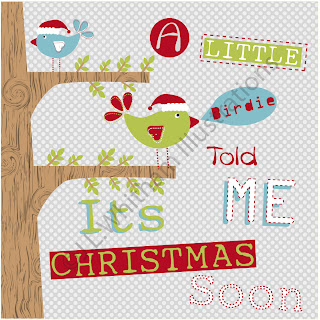
Today I share my Christmas Designs, which I have had printed onto A6 Greeting Cards, and soon to be printed on to square cards, just for a bit of variety.

I wont keep you waiting long to share my designs with you lovely lot, but I did just want to share with you all that you can now access this site by using www.jlwillustration.com as well as www.jlwillustration.blogspot.com

I'm far off having my own website, However I wanted to secure my domain name and here is as good a place as any to use it until that day comes when a website is up and running.

On that note:


           Square Card                                 A6 Layout 


I also have a Christmas Shopping List notebook for Sale, which is a perfect place to save all your idea's, budgets, and purchases in one place. 

They are available in 2 different covers, with either 10 pages (£2) or 20 pages (£3), to purchase directly from me, paypal accepted, £1 postage.


Monday 17 September 2012

WATCH OUT: I've Been Crafting

.......... Okay so it's not as bad as it sounds, I made one cushion using a Spoonflower Fabric that I bought way back in 2011, after entering (and losing) a 2012 Calendar competition. I had no intentions for the 18x21 inch piece of fabric, but I wanted it. 

So its been here since NOVEMBER just sitting nice and folded on my desk waiting to be used.  I had a spare rare afternoon free with my eldest daughter and decided to make a cushion. So off we went to YouTube and sourced a simple video for an envelope cushion, you can find the tutorial it HERE

Heres a visual step-by-step of how me and my not so  little lady made a cushion:

Items Needed:

1 Pillow/Cushion ( mine was 16 x 16 inches)
1 Piece of fabric 2 inch larger than Cushion (18x18 inches)
1 piece of fabric 4 inches longer and 1 inch wider (17x22 inches)
Scissors Tape Measure, Pins, Sewing Machine, Thread


Step one: Measure fabric and Cut to size


Step Two - Iron Fabric Smooth 


Step 3 - Cut larger piece of fabric in half (to make two 17x11 inch pieces).
Step 4 - Fold one length edge over 1/2 inch and iron flat, repeat to create seamless line
Step 5 -Repeat on second piece of fabric


Step 6 - Sew both Creases straight down to fix them in place.


Step 7 - Lay front of cushion fabric (18x18 inch) face up on hard surface
Step 8 - Lay one piece of back on top, rough edges on outside.
Step 9- Repeat step 8 ensuring back layers overlap.
Step 10 - Tack in place
Step 11 - SEW!! 


Step 12: Turn fabric out and ensure corners are firmly pressed out
 (possibly cut edges on inside).
Step 13: Insert cushion


Step 14- Admire your Botch job handy work.


Simples. 


Until Next Time. 


Sunday 16 September 2012

Passion For Pattern Bloghop


If you are on the Passion for Pattern blog-hop today, you’ve probably just joined in from the wonderful blog of Cara Holland. After you have read my post, please make sure to visit Sarah Paris , she has some FABULOUS work to show you. If you have only just found the hop, pop on over to Claire’s blog where you can start from the beginning and join in the fun!


Today I am going to give you a preview of some ABSPD work that I have been creating as part of Module 3. Find out more information about the course HERE.

This Collection was created via a Mini Exercise to create a collection that didn't include Florals, Which is one of my two favourite things to draw. The other being Geometrics, so naturally I began creating. It all started with one design, and then 3 co-ordinates: 
:a simplified design
       :a simplified colour way
       :a simple border pattern 
Once I had completed the task I simply kept on going, creating 9 fabulous pieces, which I am sharing with you for the very First time. I hope to license/sell this collection, at some point in the near future.

Here it is:


This Design Will Hopefully become part of a Tea Towel Collection:


Thanks For Visiting, please feel free to visit my Portfolio page for more Designs available for License.

Thanks For Visiting.

x Jen x

Sunday 9 September 2012

One of THEM posts


Its 'One of them' posts, where its just a concoction of lots of things to share. Hope you don't mind. 

My Zazzle shop has had a facelift, and several NEW items added from my 'Pretty Paradise' Collection:

©JLW Illustration 2012


©JLW Illustration 2012


I have also had an amazing Blog Feature over at MARIA JOSE's blog. Here are a few snapshots of what she has been up to:


Mini Interview:


Maria Recreated my nail art designs on her own nails:

Images ©Majo BV2012

And here are the Original Designs:

©JLW Illustration 2012


And here is a  Giftwrap Collection for an ABSPD exercise:

©JLW Illustration 2012

  ..... And Finally  

Here are a few Christmas Greeting's Idea's that I have been working on:


All Images shows are ©JLW Illustration 2012 unless otherwise stated. 


©JLW Illustration 2012


See you later in the week, and thanks for stopping by